This website uses cookies
We use cookies to target and personalize content and ads, to provide social media features and to analyse our traffic. We also share information about your use of our site with our social media, advertising and analytics partners who may combine it with other information that you've provided to them and that they've collected from your use of their services. You consent to our cookies if you continue to use this website. Learn more
RoboForex
- Trading
- Copy trading
- Promotions
- Tools
- Partners
- About us
Instructions how to connect to the VPS server via VNC
- 1.
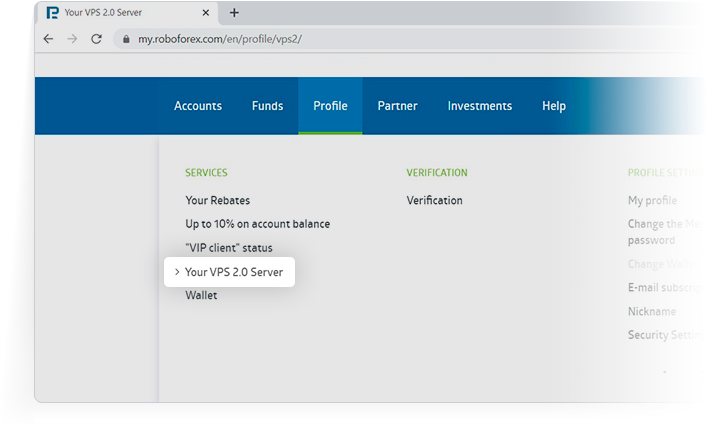
Go to your Members Area and choose the page "Your VPS 2.0 server". Here you can find all the data necessary for connecting to the VPS server via VNC.
- 2.
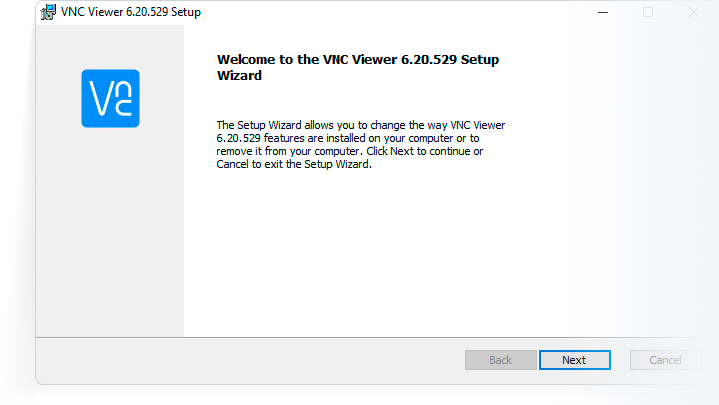
Install a free application called VNC Viewer or any other software of your choice for connecting via VNC.
- 3.
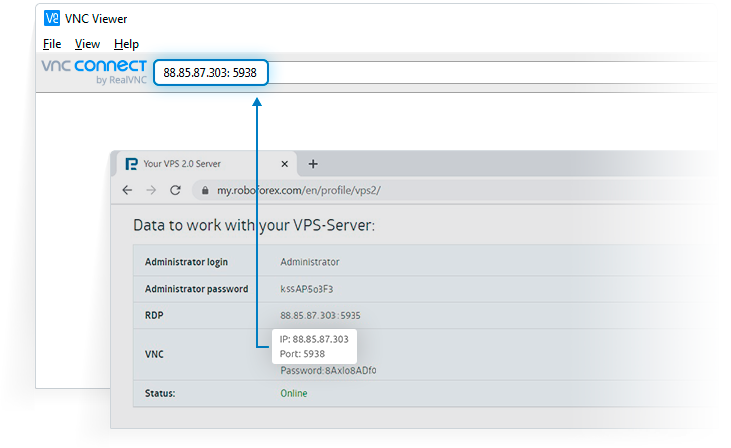
Specify your server’s IP address and the port number separated by a colon in the search bar and press “Enter”.
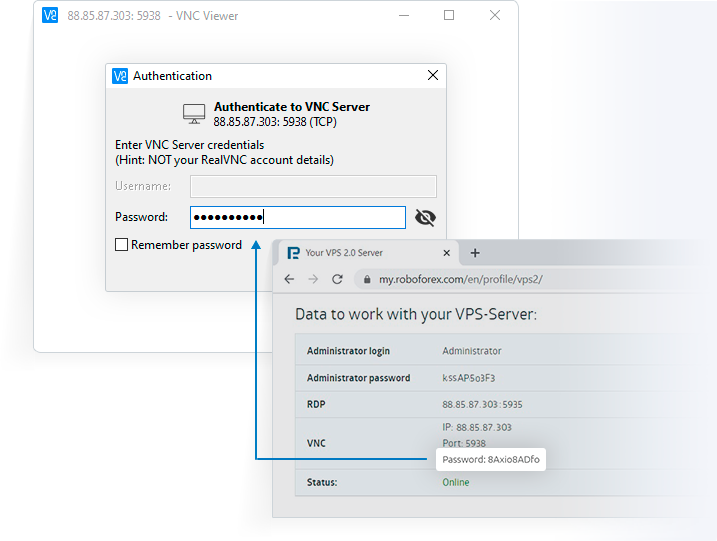
- 4.
Enter your VNC password in the pop-up window.
- 5.
Enter Administrator login and password, and press “Enter”.
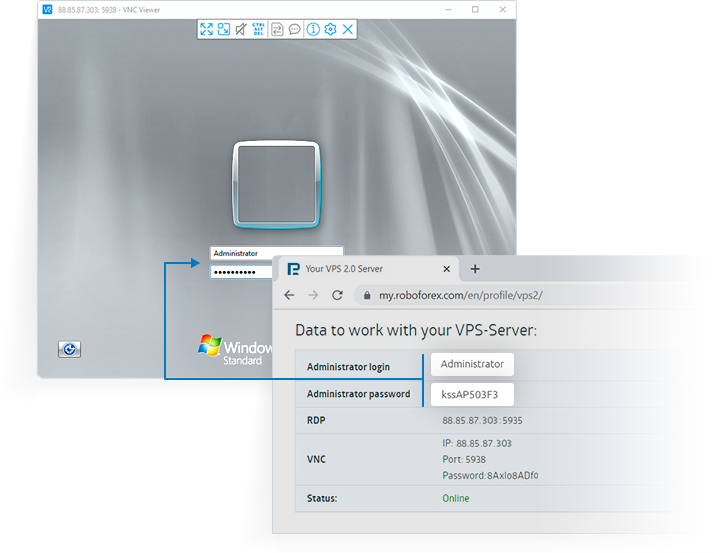
- 6.
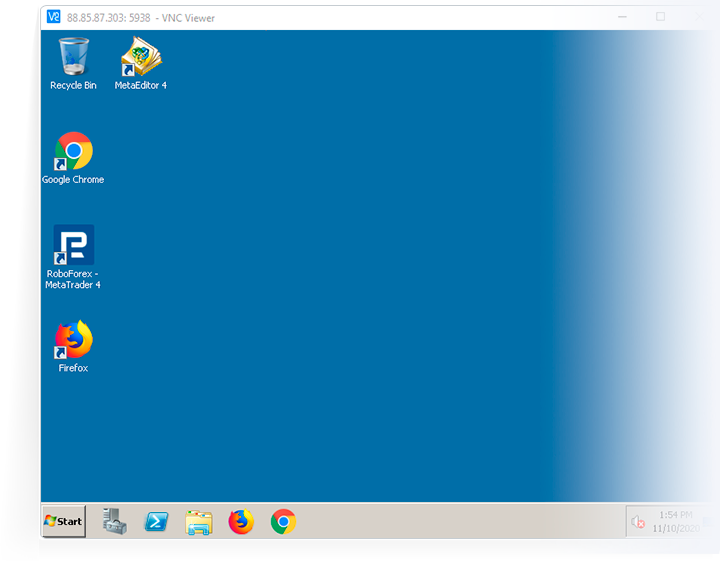
Your connection to the VPS server via VNC has been successfully installed and is ready for use!